Understanding Your Brother Printer Drum Unit
Distinguishing Drum from Toner
Okay, so a lot of people get the drum and toner mixed up, and it’s easy to see why. They both have to do with printing, right? But they’re totally different things. The toner is the actual powder that makes the letters and images on the page, while the drum is like the stencil that puts the toner in the right spots. Think of it like this: the toner is the paint, and the drum is the brush. You replace the toner way more often than the drum. The drum unit has a much longer lifespan. Knowing the difference can save you money and prevent unnecessary replacements.
Recognizing Drum Life Indicators
How do you know when your drum is getting old? Well, your printer will usually tell you. You might see a message on the screen like “Replace Drum” or “Drum End Soon.” But sometimes, the signs are more subtle. Keep an eye out for:
- Fading print quality
- Vertical lines or streaks on your pages
- Toner smudges
If you start seeing any of these, it might be time to start thinking about a new drum. Don’t ignore these signs, or your print quality will just keep getting worse. Also, some Brother printers have a drum counter that you might need to reset after replacing the drum. Check your printer’s manual for instructions on how to do that.
Impact of Print Volume on Drum Longevity
How much you print really affects how long your drum lasts. If you only print a few pages a week, your drum will probably last a long time. But if you’re printing hundreds of pages every day, you’ll need to replace it much sooner. It’s just like anything else – the more you use it, the faster it wears out. Also, the type of printing you do matters. Printing lots of images or documents with heavy toner coverage can shorten the drum’s life compared to printing mostly text. Basically, the more work the drum has to do, the quicker it’ll need replacing.
It’s a good idea to keep track of how much you’re printing. That way, you’ll have a better idea of when to expect to replace the drum. You can also adjust your printing habits to try and extend its life. For example, printing in draft mode or using less toner can help.
Optimal Printing Practices for Drum Preservation
Selecting the Right Paper Type
Okay, so paper might seem like just paper, but trust me, it makes a difference. Using the wrong kind can seriously shorten the life of your printer drum. Rough or textured paper can wear down the drum’s surface faster than smooth paper. Also, avoid paper that’s too thick or thin, as it can cause jams and put extra strain on the drum.
- Use paper recommended by Brother.
- Avoid heavily textured or recycled paper if possible.
- Check the paper’s weight; too heavy or light can cause issues.
Avoiding Excessive Print Density
High print density means your printer is laying down more toner, which can wear out the drum faster. Think about it: more toner, more friction, more wear and tear. It’s like driving your car in the city versus on the highway; stop-and-go wears down the brakes faster.
Dialing back the print density a bit can really extend the life of your drum. You might not even notice a huge difference in print quality, but your drum will thank you.
Managing Print Job Queues Effectively
Ever sent a bunch of print jobs at once, only to realize you made a mistake on the first one? Canceling print jobs mid-process can waste toner and put unnecessary stress on the drum. It’s better to double-check everything before hitting that print button.
- Preview documents before printing.
- Combine multiple documents into one print job when possible.
- Cancel unwanted print jobs immediately to minimize toner waste.
Efficiently managing your print queue can significantly reduce unnecessary wear and tear on your drum unit.
Routine Maintenance for Extended Drum Life
Gentle Cleaning Techniques for the Drum
Okay, so you want your drum to last? Cleaning is key. But you can’t just go at it with any old cleaner. You need to be gentle. I usually use a lint-free cloth, slightly damp. Never use anything abrasive, or you’ll scratch the drum surface. That’s a one-way ticket to print quality problems. Wipe gently in one direction. Don’t rub back and forth. And make sure the drum is cool before you start cleaning. I usually wait at least 30 minutes after printing.
Proper Storage of Spare Drum Units
If you have a spare drum unit, don’t just toss it in a drawer. Store it properly. Keep it in its original packaging if you can. If not, wrap it in something to protect it from light and dust. Light can damage the drum surface over time. And dust? Well, that just gets everywhere. Store it in a cool, dry place. Not in the garage where it gets super hot in the summer. I keep mine in a closet in the house.
Addressing Environmental Factors
Your printing environment matters more than you think. Humidity and temperature can affect drum life. Try to keep your printer in a room with stable conditions. Avoid direct sunlight. And if you live in a dusty area, consider using an air purifier. It sounds crazy, but it can help. Also, make sure your printer is on a stable surface. Vibrations can’t be good for the drum. I learned that the hard way when my printer was on a wobbly table and the prints started coming out weird.
Keeping your printer in a clean, stable environment can significantly extend the life of your drum unit. Simple things like avoiding direct sunlight and controlling humidity can make a big difference.
Here’s a quick list of things to consider:
- Keep the printer away from direct sunlight.
- Maintain a stable temperature and humidity.
- Use an air purifier if you live in a dusty area.
- Ensure the printer is on a stable surface.
Troubleshooting Common Drum-Related Issues
Resolving Streaks and Smudges
Streaks and smudges are super annoying, right? They can make your prints look unprofessional, and it’s often a sign something’s up with your drum. First, check the drum’s surface for any visible debris. Sometimes, a small piece of paper or toner can get stuck and cause these issues. Gently clean the drum with a lint-free cloth. If that doesn’t work, try these steps:
- Remove the drum unit from the printer.
- Inspect the drum surface for scratches or damage.
- Clean the drum with a dry, lint-free cloth.
- Reinstall the drum unit and print a test page.
If the streaks persist, the drum might be nearing the end of its life or be damaged. Time to think about a replacement.
Dealing with Faded Prints
Faded prints are another common problem. It’s like, why even print if you can barely see it? Usually, this isn’t always a drum issue, but it can be related. Make sure your toner isn’t low first. If the toner is fine, the drum might be the culprit. A worn-out drum won’t transfer toner effectively, leading to faded output. Also, check your printer settings. Sometimes, the print density is set too low. Here’s a quick checklist:
- Check toner levels.
- Adjust print density settings.
- Clean the drum unit.
- Consider drum replacement if the issue persists.
If you’ve tried everything and the prints are still faded, it might be time to call in a professional. Sometimes, there are underlying issues with the printer itself that are causing the problem.
Resetting the Drum Counter Accurately
Okay, so your printer is telling you to replace the drum, but you just put in a new one? Super frustrating! You need to reset the drum counter. The process varies depending on your Brother printer model, so check your user manual. Usually, it involves pressing a combination of buttons on the printer’s control panel. If you don’t reset the counter, the printer will keep displaying the “Replace Drum” message, even with a new drum installed. Here’s a general idea of what to do, but again, check your manual:
- Open the front cover of the printer.
- Press and hold the “Go” or “OK” button.
- Wait for the “Drum Clear” message to appear.
- Release the button and close the front cover.
| Printer Model | Reset Button Combination |
| HL-L2350DW | Go button for 2 seconds |
| MFC-L2750DW | OK button, then Up arrow |
| DCP-L2550DW | OK button for 2 seconds |
Resetting the drum counter is important for accurate monitoring of drum life. It ensures that you’re not replacing the drum prematurely or running it for too long, which can affect print quality.
When to Consider Drum Replacement
It’s easy to forget about the drum unit in your Brother printer until something goes wrong. Unlike toner, which you replace regularly, the drum unit has a longer lifespan. But it does wear out eventually. Knowing when to replace it can save you from poor print quality and potential printer damage.
Identifying Irreparable Drum Damage
Sometimes, the signs are obvious. If you see physical damage to the drum, like scratches or gouges, replacement is a must. But other times, it’s more subtle. Here’s what to look for:
- Consistent Streaks or Spots: If cleaning doesn’t fix recurring marks on your prints, the drum surface is likely damaged.
- Backgrounding: A light gray haze across the entire page indicates the drum is no longer properly holding or transferring toner.
- Uneven Print Density: If some areas are dark and others are faded, the drum’s coating may be wearing unevenly.
Evaluating Cost-Effectiveness of Replacement
Before rushing to buy a new drum, consider the cost. Drum units aren’t cheap, so weigh the price against the age and overall condition of your printer. If your printer is several years old and showing other signs of wear, it might be more economical to invest in a new printer altogether. Here’s a simple breakdown:
| Factor | Consider Replacing Drum If: | Consider Replacing Printer If: |
| Printer Age | Less than 5 years old | More than 5 years old |
| Other Issues | No other major problems | Experiencing multiple issues (e.g., paper jams, slow printing) |
| Drum Replacement Cost | Less than 50% of a new printer | More than 50% of a new printer |
| Frequency of Drum Problems | Isolated incident, likely due to a specific event (e.g., paper clip) | Recurring problems even after cleaning and proper maintenance |
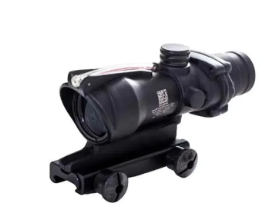
Finding Quality Replacements at Cartridge World Shop
When you’ve decided it’s time for a new drum, finding a reliable source is key. Cartridge World Shop is a good place to start. They usually have both genuine Brother drums and compatible options. Genuine drums are made by Brother and guaranteed to work with your printer. Compatible drums are made by third-party manufacturers and can be more affordable. Just make sure to read reviews and check the warranty before buying a compatible drum. A bad drum can cause more problems than it solves.
Replacing a drum unit might seem daunting, but it’s often a straightforward process. Most Brother printers have clear instructions in the user manual. Take your time, follow the steps carefully, and you’ll be back to printing in no time. Don’t forget to properly dispose of your old drum unit according to local regulations.
Advanced Tips for Maximizing Drum Performance
Firmware Updates and Their Role
Keeping your Brother printer’s firmware up-to-date is more important than you might think. Firmware updates often include optimizations that can improve drum performance and lifespan. These updates can address bugs that might cause unnecessary wear and tear on the drum unit. It’s a good idea to check the Brother support website regularly for new firmware releases specific to your printer model. The process is usually pretty straightforward, involving downloading the update to your computer and then transferring it to the printer via USB or network connection. I’ve skipped updates before and regretted it when my printer started acting weird, so now I try to stay on top of them.
Understanding Printer Settings for Drum Health
Your printer’s settings can have a big impact on drum health. For example, using a lighter print density can reduce the amount of toner used, which in turn reduces the strain on the drum. Also, consider using the “toner save” mode if your printer has one. This mode uses less toner, extending both the toner cartridge and drum life, though it might slightly reduce print quality. Experiment with different settings to find a balance between print quality and drum longevity. I usually keep mine on the default settings, but I might try playing around with them now that I’m thinking about it.
Here’s a quick rundown of settings to consider:
- Print Density: Lowering this reduces toner samsung usage.
- Toner Save Mode: Extends toner and drum life.
- Resolution: Higher resolution uses more toner.
Professional Cleaning and Servicing
Sometimes, no matter how careful you are, your printer might need a professional cleaning. Dust and toner particles can build up inside the printer, affecting drum performance. A qualified technician can disassemble the printer, clean all the internal components, and lubricate moving parts. This can significantly extend the life of your drum and improve print quality. It’s like taking your car in for a tune-up – it can make a big difference. I haven’t done this myself, but I’ve heard it’s worth the investment if you want to keep your printer running smoothly for years.
Regular professional servicing can prevent minor issues from becoming major problems, saving you money in the long run. It’s a good idea to schedule a service appointment every year or two, depending on your printing volume.
Sourcing Reliable Drum Units and Supplies
Benefits of Genuine Brother Parts
When it comes to keeping your Brother printer running smoothly, using genuine Brother drum units can make a real difference. These parts are specifically designed to work with your printer model, which can lead to better print quality and fewer issues down the road. Think of it like this: using the right tool for the job just makes things easier and more efficient. Plus, genuine parts often come with a warranty, giving you some peace of mind.
- Consistent performance.
- Reduced risk of printer damage.
- Warranty coverage.
I’ve tried generic drum units before, and honestly, it was a mixed bag. Some worked okay, but others caused all sorts of problems, like streaks and smudges on my prints. It ended up costing me more time and money in the long run. Sticking with genuine parts has been a much better experience.
Exploring Compatible Options from Cartridge World Shop
If you’re looking to save some money, compatible drum units from places like Cartridge World Shop can be a good alternative. These units are designed to work with your Brother printer but are often sold at a lower price. However, it’s important to do your research and choose a reputable brand. Read reviews and check the warranty before you buy. Sometimes, saving a few bucks isn’t worth the hassle if the quality isn’t up to par.
- Cost savings.
- Variety of brands.
- Potential for comparable performance.
Verifying Supplier Authenticity
No matter where you buy your drum units, it’s crucial to make sure the supplier is legit. Counterfeit parts are a real problem, and they can damage your printer or give you terrible print quality. Look for suppliers with a good reputation and check for signs of authenticity, like proper packaging and labeling. If a deal seems too good to be true, it probably is. I always check the supplier’s website and look for customer reviews before making a purchase. It’s better to be safe than sorry!
- Check for proper packaging and labeling.
- Read customer reviews.
- Verify the supplier’s contact information.
Wrapping Things Up
So, there you have it. Taking care of your Brother printer drum isn’t really that hard. A little bit of attention can make a big difference in how long it lasts. You don’t need to be a tech wizard or anything. Just follow these simple steps, and you’ll get more prints out of your drum unit. It’s all about being smart with your printer, saving some money, and keeping things running smoothly. Give it a try!
Frequently Asked Questions
What exactly is a drum unit in a Brother printer?
A drum unit is a part of your Brother printer that helps put the toner powder onto the paper. Think of it like a special roller that uses static electricity to pick up the toner and then transfer it to the page. It’s different from the toner cartridge, which just holds the powder.
How can I tell if my Brother printer’s drum unit is going bad?
You can often tell if your drum unit is getting old if your printouts start looking bad. This might mean faded words, strange lines, or smudges on the paper. Your printer might also show a message on its screen telling you the drum is low or needs to be replaced soon.
Does printing a lot make my drum unit wear out faster?
Yes, how much you print really affects how long your drum unit lasts. If you print a lot of pages every day, your drum will wear out faster than if you only print a few times a week. It’s like how car tires wear out quicker if you drive more.
What are some easy ways to make my drum unit last longer?
To make your drum unit last longer, try to use good quality paper that’s not too rough. Also, avoid printing very dark or heavy images all the time, as this can make the drum work harder. Keeping your printer clean and in a good spot (not too dusty or hot) also helps.
My prints look bad; can I fix my drum unit, or do I need a new one?
Sometimes, if your prints have streaks or look faded, you can try gently cleaning the drum unit. Your printer’s manual will show you how to do this safely. Also, make sure you’re using the right settings for your prints. If these simple steps don’t work, the drum might be at the end of its life.
When should I really replace my Brother printer’s drum unit?
You should think about getting a new drum unit when your print quality is consistently poor, even after cleaning, or when your printer tells you it’s time. Sometimes, it’s cheaper to replace the drum than to keep dealing with bad prints or trying to fix an old one. Cartridge World Shop is a good place to look for new ones.